
1Install the app
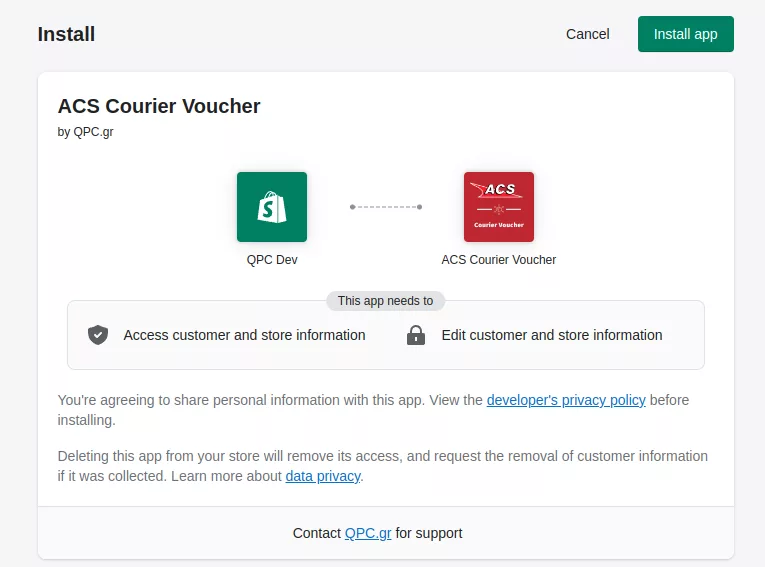
Log in to your Shopify store admin and open the app's page on the Shopify App Store:
Then click the Install app button on the page that opens:
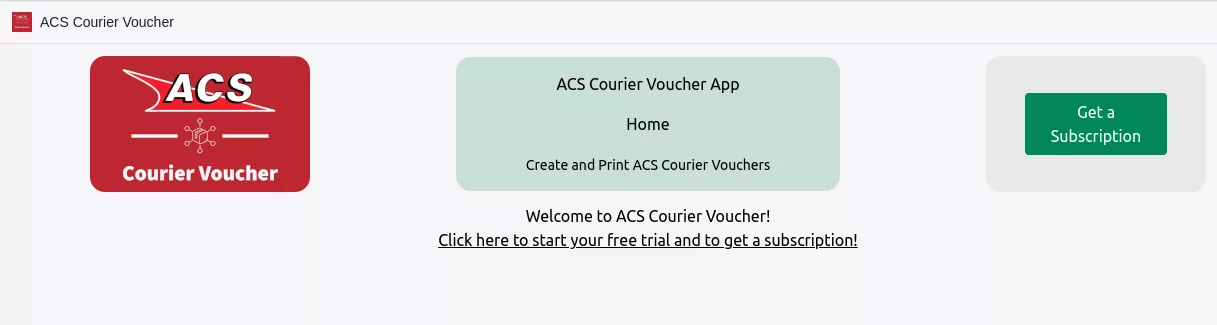
Once the app is installed, you'll be taken to the app's home page inside your Shopify store:
2Subscription & free trial
Click either the Click here to start your free trial and to get a subscription! link or the Get a Subscription button. You'll be taken to the subscriptions page:
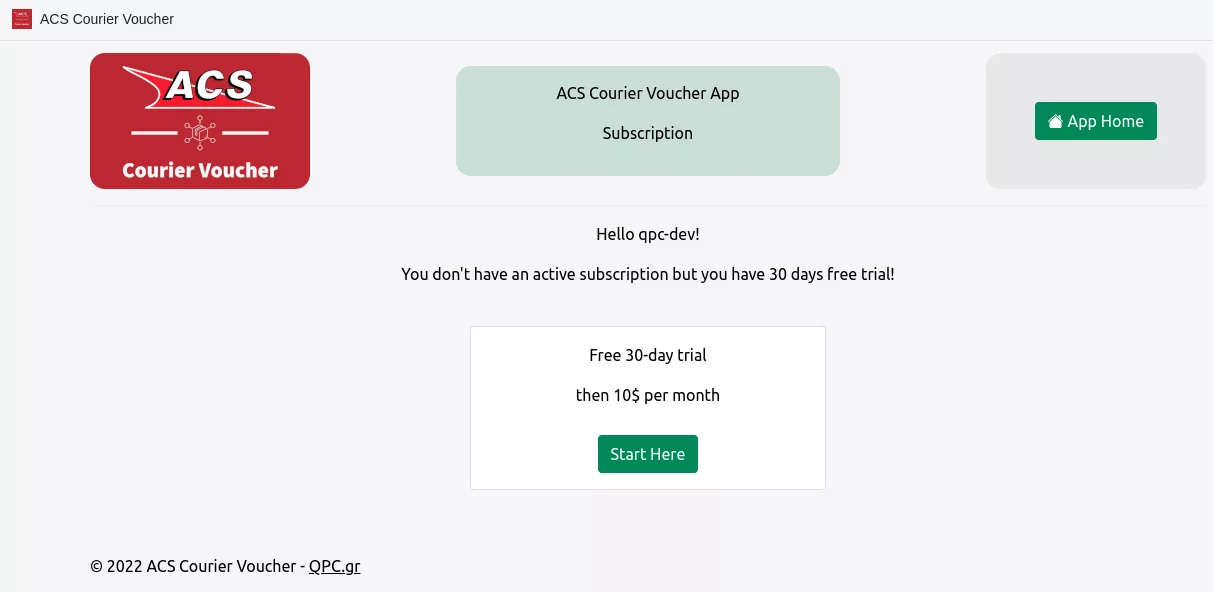
Click Start Here in the box titled “Free 30-day trial” to start your 30-day free trial.
After the free trial, the app costs $10 per month, billed through your Shopify account.
You'll then be asked to approve the free trial and the monthly charge that follows it:
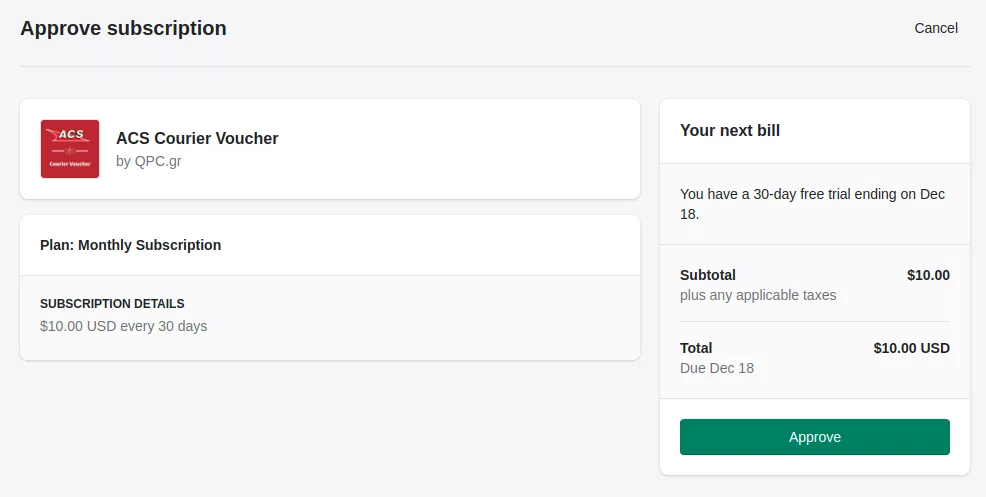
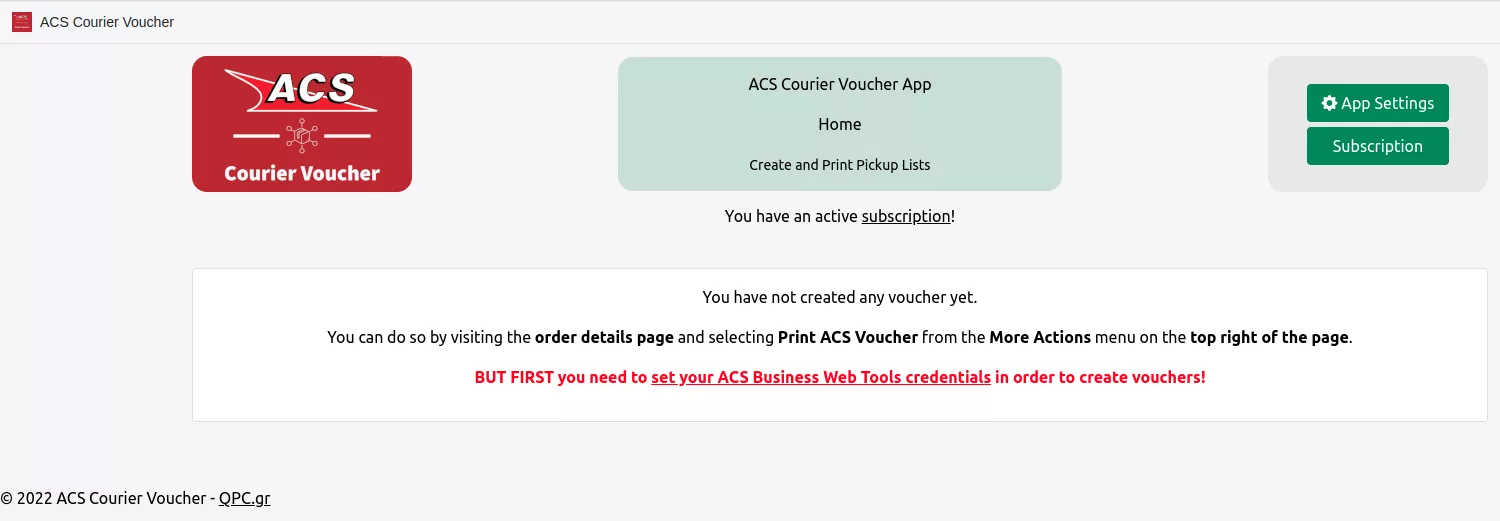
Click Approve. You'll be taken back to the app's home page:
3App settings
One last step before you can create ACS Courier vouchers: enter your ACS Web Services credentials. If you don't have them yet, ask the ACS branch you work with, or call ACS on +30 210‑8190000 and request ACS Web Services access.
Click the set your ACS Business Web Tools credentials link or the App Settings gear button to open the settings page:
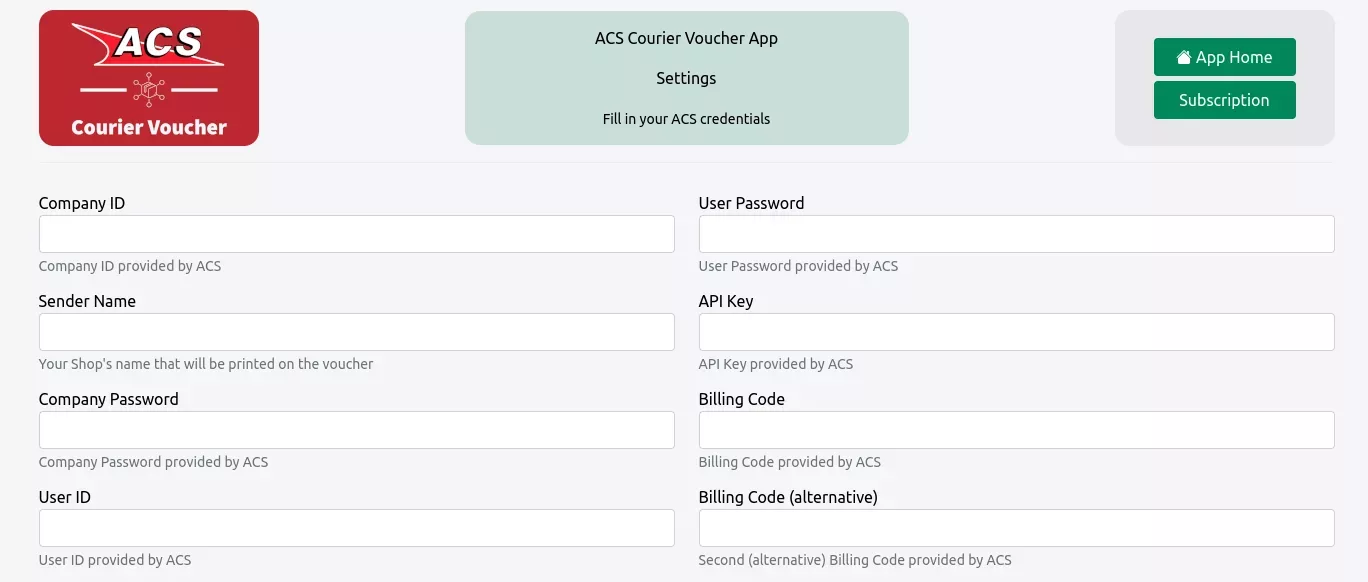
Enter the credentials you received from ACS. Here's what each field means:
| Field | Description |
|---|---|
| Company ID | Your company code |
| Company Password | Your company password |
| User ID | Your user name |
| User Password | Your user password |
| API Key | Your ACS Web Services API key |
| Billing Code | Your ACS credit billing code |
| Billing Code (alternative) | Optional: a second ACS credit billing code, if you have one (e.g. a separate code for heavy parcels). |
| Sender Name | The sender name you want printed on the voucher. |
Basic options
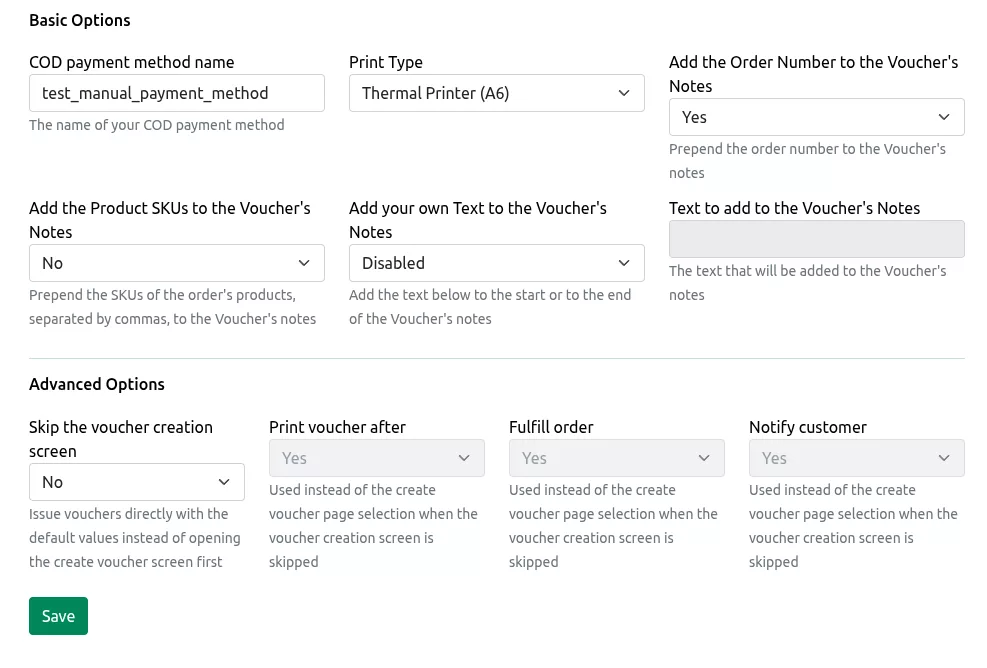
Further down the same page you'll find the app's basic and advanced options:
| Field | Description |
|---|---|
| COD payment method name | The name of your cash-on-delivery payment method in Shopify. |
| Print Type | The type of printer you'll print vouchers on: Laser Printer (A4) or Thermal Printer (A6). |
| Add the Order Number to the Voucher's Notes | When set to “Yes”, the order number is added to the start of the voucher notes, which are printed on the voucher. |
| Add the Product SKUs to the Voucher's Notes | When set to “Yes”, the SKUs of the order's products, separated by commas, are added to the start of the voucher notes. |
| Add your own Text to the Voucher's Notes | Adds your own text to the start or the end of the voucher notes. Choose “Disabled” to turn it off. |
| Text to add to the Voucher's Notes | The text to add, e.g. “OPEN BEFORE PAYING”. It becomes editable once you choose start or end in the previous setting. |
Any delivery notes your customer leaves on the order are also added to the voucher notes automatically. Changes to the notes options apply to vouchers created after you save.
4 vouchers per A4 sheet: choose Thermal Printer (A6) as the Print Type and, when you bulk-print vouchers from Google Chrome, set Pages per sheet to 4. This lets you print on A4 sticker paper with 4 labels.
Advanced options
If you don't need to check the shipment details every time, you can skip the voucher creation screen altogether:
| Field | Description |
|---|---|
| Skip the voucher creation screen | When set to “Yes”, vouchers are created straight away with the default values, without opening the voucher creation screen first. You'll be asked to confirm when you turn it on. |
| Print voucher after | Whether the voucher PDF opens for printing right after it's created. |
| Fulfill order | Whether the order is marked as fulfilled in Shopify, with the ACS tracking number. |
| Notify customer | Whether your customer gets a shipping notification email. |
The last three fields are only enabled when the creation screen is skipped, and they replace the matching choices on that screen. If a voucher can't be created, because a detail is missing or ACS returns an error, the creation screen opens as usual so you can fix it.
Double-check that everything is correct, click Save, and you're ready to create vouchers!
4Create a voucher
To create a voucher for an order, open the order's details page (the Orders menu, then click the order you want to ship).
Then click the More Actions menu at the top right, as shown below:
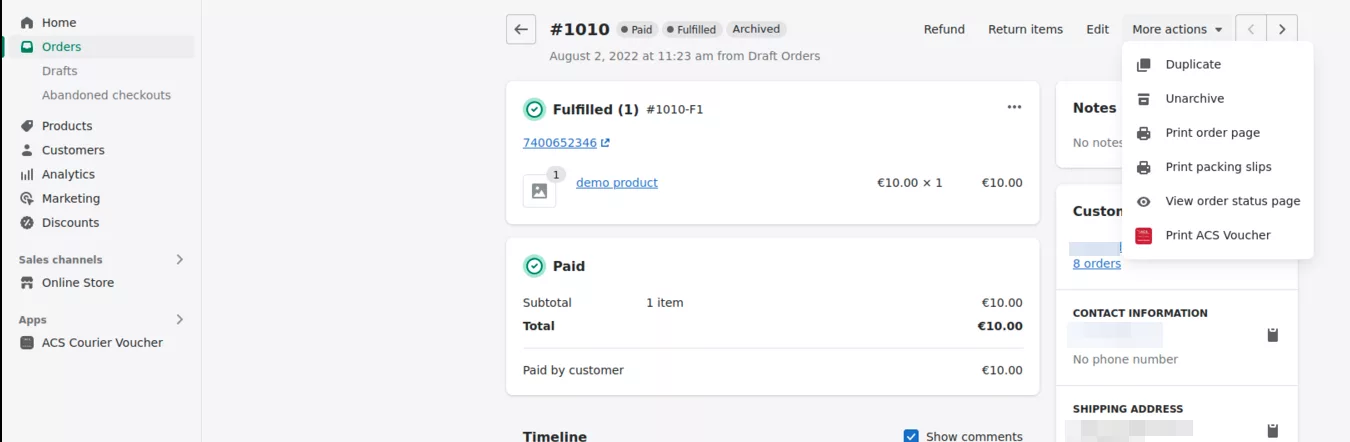
and choose Print ACS Voucher. You'll see the following page:
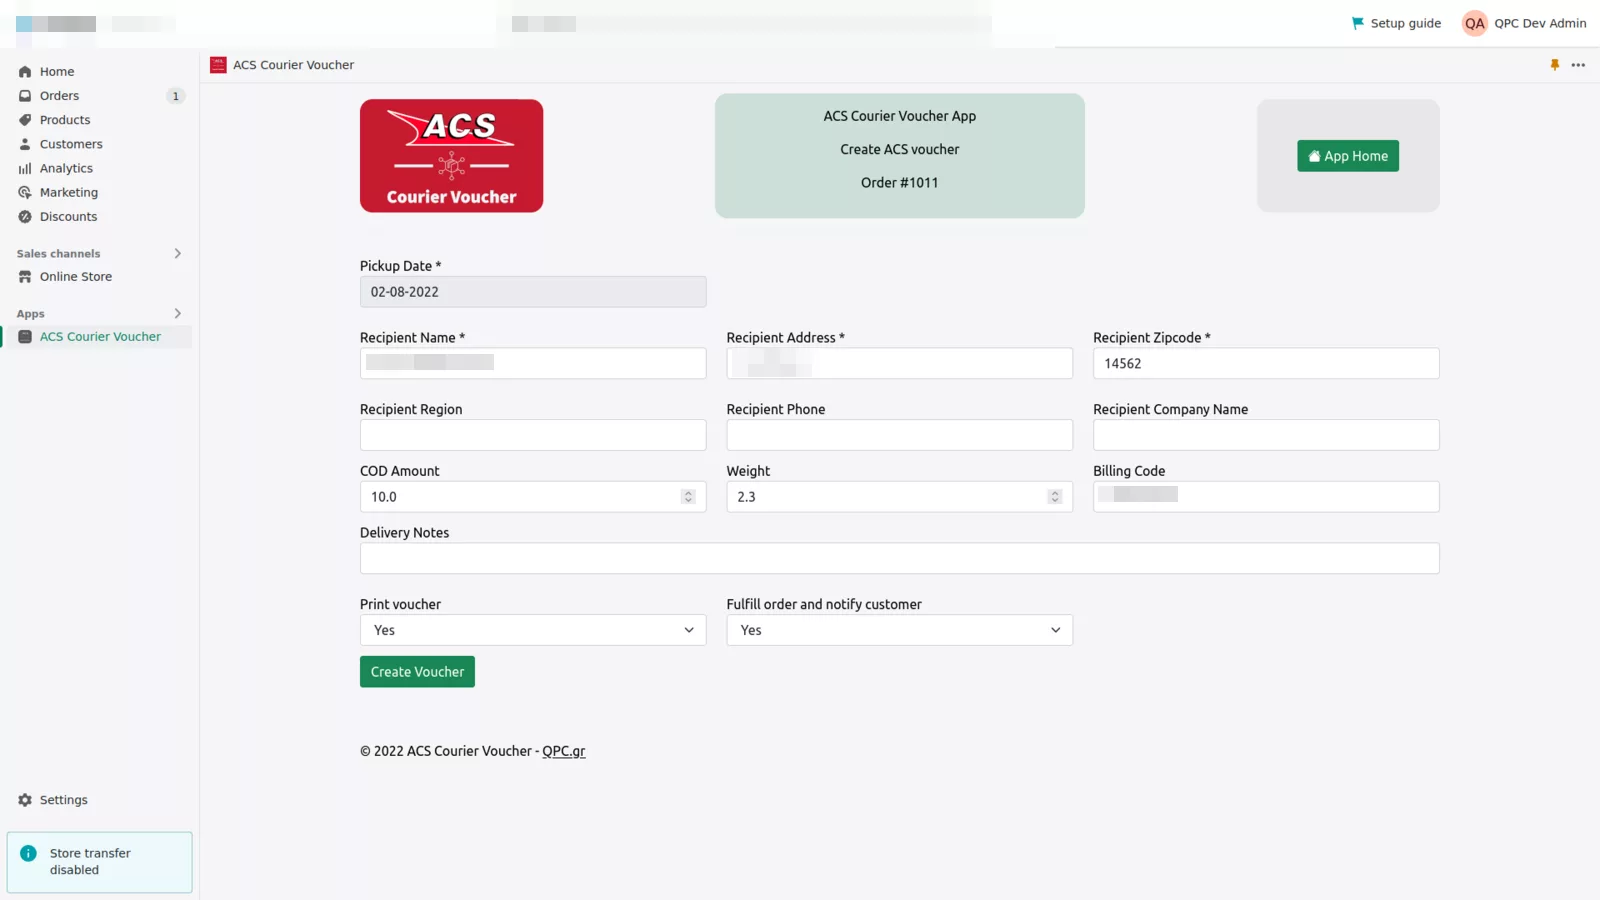
Check that the details are correct and fill in anything missing. You can add notes for the courier in the Delivery Notes field.
- Print voucher sets whether the voucher is printed right after it's created.
- Fulfill order sets whether the order is marked as fulfilled in Shopify and gets the ACS tracking number.
- Notify customer sets whether your customer gets a shipping notification email. You can fulfill an order without notifying the customer, if you prefer.
All of them are set to yes by default. Click Create Voucher: the voucher is created and opens as a PDF in a new tab, ready to print.
If you've turned on Skip the voucher creation screen in the settings, this screen is skipped and the voucher is created straight away with the default values.
5Daily pickup list
Printed vouchers only become real shipments once you create and print the daily pickup list. If you skip it, the voucher barcodes won't be recognised by ACS.
To print the daily pickup list, open the app's home page: click Apps in the left-hand menu, then ACS Courier Voucher. You'll see this page:
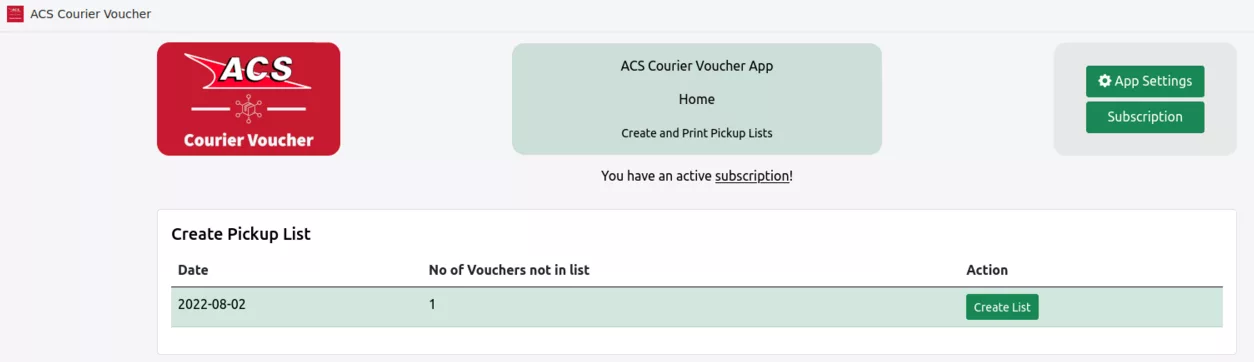
Click Create List to start the day's list. You'll see this page:
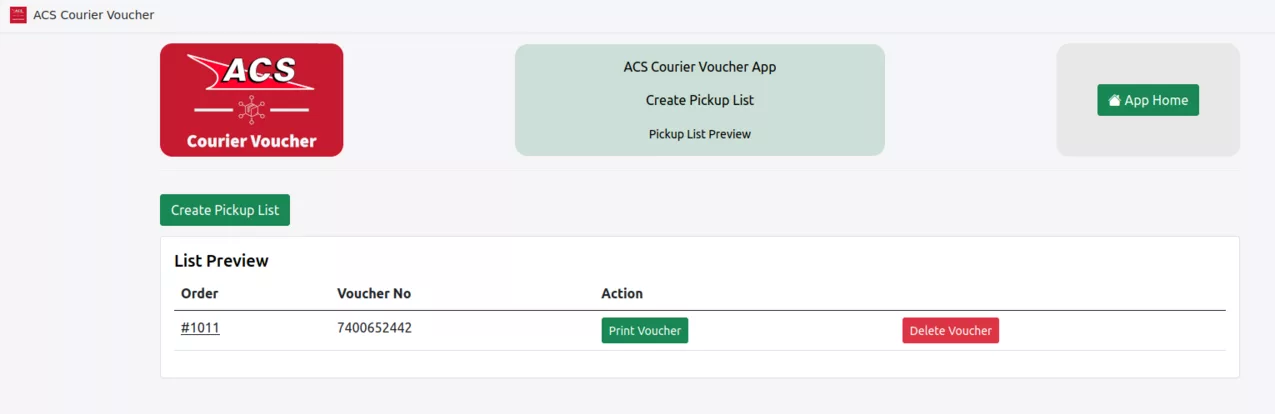
Here you can print any vouchers on the list you haven't printed yet, or delete a voucher.
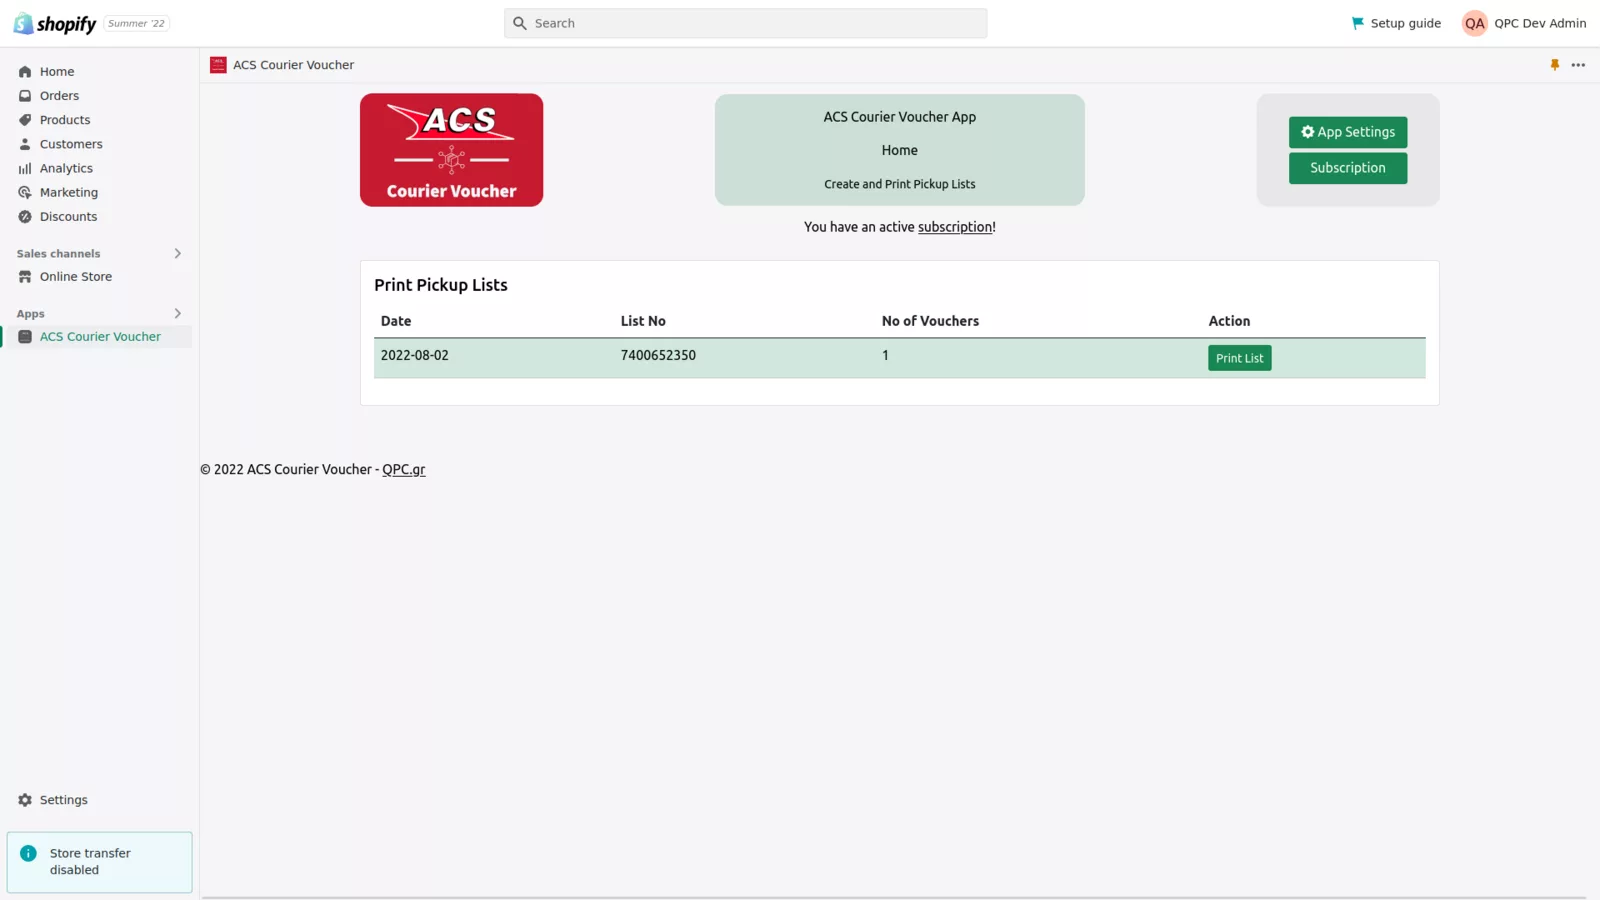
Click Create Pickup List to create and print the list. It opens as a PDF in a new tab, ready to print. You can view and reprint it at any time from the app's home page.
Ready to get started?
Install ACS Courier Voucher and create your first voucher today. The first 30 days are free.